
This amazing piece of abstract art is the result of a failed experiment, it just goes to show…
mistakes are often magic in the making!
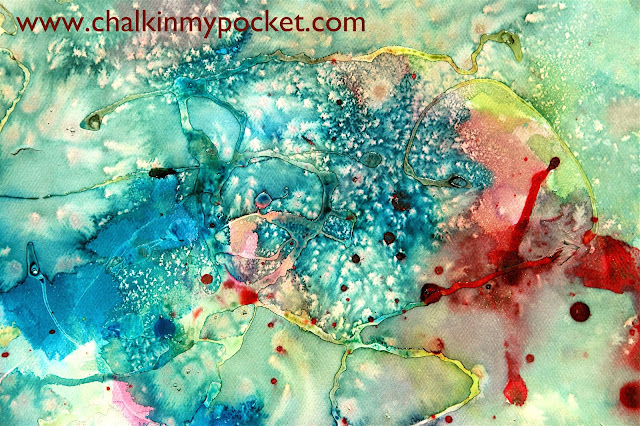
Elmer’s blue school gel can be used to make batik fabric, it peels right off and leaves behind contrasting white stripes. I hoped to recreate the same thing on paper (like you would with rubber cement, but a less stinky option for working with kids). It didn’t work.
BUT….

I’m not chalking this up as a failure, I think this is a pretty darn cool piece of art!
The glue reacted with the paint in such a unique way – the photo doesn’t really capture how raised it is. The organic shape, texture and the reflectiveness are stunning. The glue appears to be “wet” and magnifies the paint underneath.
The white starbursts seen throughout the painting are pockets of salt on the liquid watercolors. It’s a clever little piece of magic to watch the salt chase away the pigment underneath it.
If you haven’t tried salt and watercolors together, you must add it to your to-do list. This is a creative, abstract watercolor piece that any kid and toddler can make (and you can be proud to display).
Here is EXACTLY how we did this:
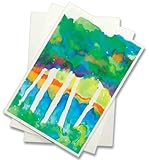
- Grab some Elmer’s Blue School Gel and “draw” all over a piece of thick water color paper with it.
- Let the glue dry, the longer it dries, the more “3D” the painting will appear. We left it 8 hours.
- Once the glue is dry, paint over your picture and the glue using liquid watercolors.
- While the watercolors are still wet, sprinkle with salt (any kind in your kitchen will do)
Speaking of liquid watercolors, check these out. I’m always receiving emails about where to buy them, and these are one of my favorite brands (and the ones that seem to be non-staining, especially important if you’re making Bathtub Puffy Paint!)
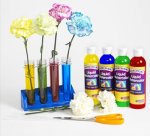

Here are the exact products I’ve used. I think the watercolor paper in a pack of 100 is the most affordable option in terms of paper. You want something really thick and the 15 sheet pads are really pricy at my local crafts store.
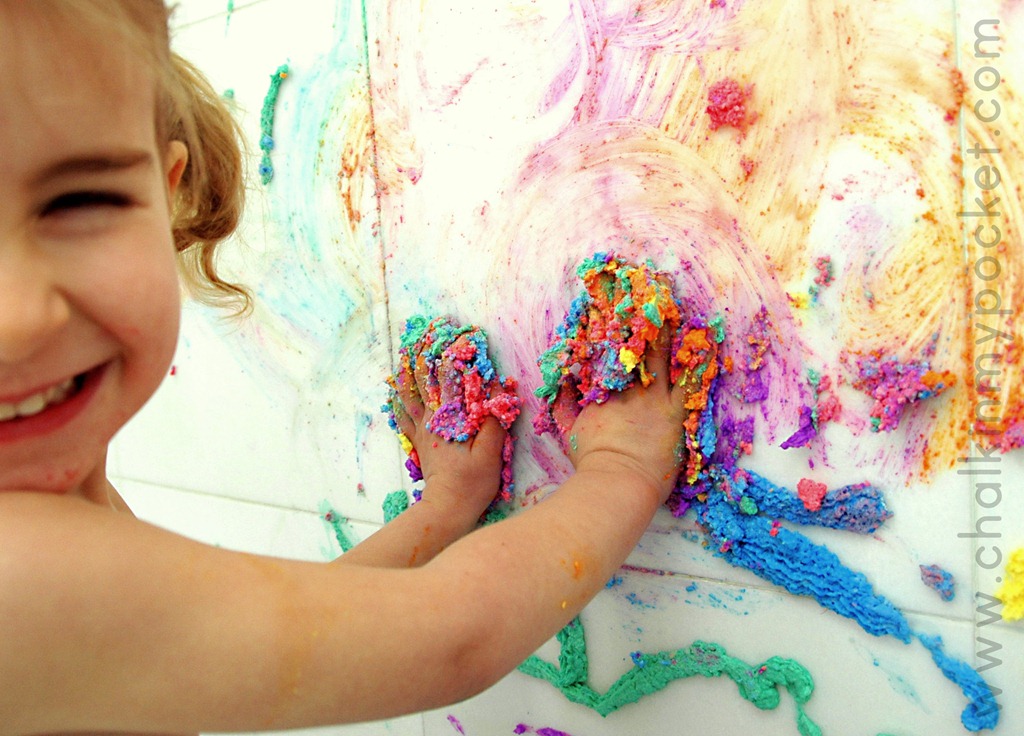
Looking for even more fun with your liquid watercolors? Try bathtub puffy paint, a tactile art experience that is mess free — and actually made of soap:
UPDATE 2.14.2012


What a gorgeous effect! It's only through experimentation that discoveries are made, and I think you're on to something here. And thanks to you, I've also bookmarked the batik project. Too bad we don't live closer to each other to share materials, as I have the paint but not the glue!
Gorgeous.
Thanks for the comment about my cookies. I haven't tried it with butter, but I think they should turn out fine.
Ooh that's very pretty – must have a go!
Very beautiful! Anxious to see your batik on fabric soon!
That is so pretty!!!
The picture is so truly amazing! I love your beautiful blog and you have such an awesome list of projects and fun DYI. You are very creative! I am now following you thanks to Boost My Blog Friday last week, and it would be so nice if you could share the love back on my blog:)
And don't forget to check out our new Blog Tutorial going on today. It's pretty easy and it comes in handy, especially for creative people like you and your awesome bunch:) See you there!
Happy Wednesday
Beautiful! I'd frame it!
There is a new online community for teachers to share ideas, thoughts, and funny stories. It's also a great way for bloggers to find other like minded teachers to follow their blogs. Check it out today at AnonymousApple.com
Oooh I think this looks FABULOUS! Definitely a unique piece of art! Lovely!
Thanks for linking up to Kids Get Crafty! Fabulous to see you there!
Maggy
This is gorgeous!!! I am a follower and I am having my first ever linky party for kids activities and I would LOVE if you would come link up this project! Hope to see you soon!
Michelle
http://delicateconstruction.blogspot.com/2011/03/very-first-made-by-little-hands-linky.html
LOVE LOVE LOVE liquid water colors, note to self, go enter that giveaway! Thanks so much for linking this up to Made by Little Hands Mondays too!
I featured you this week, come check it out!
Michelle
http://www.delicateconstruction.blogspot.com
Hi Regina,
I think we've met before at the Tinker Labs where you and I shared ideas over the art dice. 🙂
The batik effect on paper looks really unique. Like, you suggested, there's much scope for trial and error here and lots of fun can be had in the process.
Thanks for sharing. I am going to subscribe to your blog… 🙂
Just landed over here (and subscribed!), so I'm not sure if you've already tried this. When I was in college I used to take rubber cement on both watercolor paper and illustration board to mask off areas to get the effect I think you were looking for here. I had so much fun with the technique I created TONs of paintings!
This comment has been removed by the author.
will you please write out how you did the painting above. I know you used glue, salt and watercolor but not sure in what order, etc. I would love to try this with my kids next week!!
Found you through Pinterest! I LOVE this so much! How did you do the painting? The steps involved? Thank you!
I would love to know the steps involved as well. I NEED to do this with my grade one class!! 🙂
I just showed this pic to my 5 year old daughter and she can't wait to try this!!!
Hello! I'm so impressed with your art and blog, and tell your daughter thank you for visiting my blog (asmalltowndad) and liking my Rhino painting. I tried to leave a comment yesterday but it failed to go thru, so I'm trying a different approach. Love the art and the time you and your daughter spend together being creative. My two daughters are now 21 and 18, and I don't get to do as much with them as I would like, but I have so many memories and hope to make more in the future with them. Thank you both and I hope to see more in the future!
So beautiful! But please do tell how specifically you did it!
Hi,
I want to know, too, how you did this. Did you paint and then sprinkle salt on? Did you mix the salt in with the paint and then paint? Please explain the steps. Thanks!
This comment has been removed by the author.
Please do a step by step.
A step by step would be awesome. I mostly want to know if you have to mix the paint with the glue to make the raised effect.
Great look! I would appreciate a step by step also. :-). Thanks!
Como se hace???????
LOVE it! I saved it to give this a try!
Are you OK if I share your blog on mine… with a link to yours?
Love this effect!! Will trying it soon! Thanks for explain us your experience!! Hugs
Thanks so much for this great idea! I tried it out and was thrilled with the results. Yours are simply amazing!
Can anyone tell me what major chemical components Elmers Blue Glue is? We don't have the brand here in Australia and I would love to try this project. I'm sure there is a simple substitute I can purchase here without having to resort to buying it online. Takes the fun out of it if it's going to cost a fortune. Thankyou so much for your generosity in sharing this great idea.
Do you think this would work on an art canvas?
I love this technique and it is on my list of `gonna do`. I too am wondering about the glue, in australia we dont have that type of glue. I am gonna give Aquadhere a go. It looks so cool, and the one that you have created is definately worth framing and hanging.
I'm also wondering if this would work on canvas…
Hi there! Sorry not to have replied sooner, this project would work beautifully on canvas. I'd reply to each of you directly but since you're “anonymous” I cannot find your blogs or email addresses.
Absolutely. A reader sent me photos of a scene they completed on canvas — it worked beautifully. If you use rubber cement instead of the blue gel glue you can get an authentic “batik” piece with a resist area. Either way is beautiful but be aware the rubber cement should be used with caution around children and is extremely odorous.
Absolutely. A reader sent me photos of a scene they completed on canvas — it worked beautifully. If you use rubber cement instead of the blue gel glue you can get an authentic “batik” piece with a resist area. Either way is beautiful but be aware the rubber cement should be used with caution around children and is extremely odorous.
This is a great craft idea. Please come by and link it to Artsy Play Wednesday. I saw your post featured on the Crafty Crow.
I am late finding this cool idea, but I am wondering if “regular” white school glue would work. Is there something special about using the blue glue? I am anxious to try this with my kids! 🙂
Looking forward to trying this! Is there any reason to use blue vs. white school glue? (I have a ton of the white stuff)
Hi there! The blue gel stuff dries clear and appears “wet” and shiny even after the watercolors have dried. We have tried it with the regular glue and had great results though, just make sure the glue is really dry before painting over everything, the finish will be a bit more “matte” in appearance but equally as lovely!
Hi there! The blue gel stuff dries clear and appears “wet” and shiny even after the watercolors have dried. We have tried it with the regular glue and had great results though, just make sure the glue is really dry before painting over everything, the finish will be a bit more “matte” in appearance but equally as lovely!
Hi there! The blue gel stuff dries clear and appears “wet” and shiny even after the watercolors have dried. We have tried it with the regular glue and had great results though, just make sure the glue is really dry before painting over everything, the finish will be a bit more “matte” in appearance but equally as lovely!
Hi there! The blue gel stuff dries clear and appears “wet” and shiny even after the watercolors have dried. We have tried it with the regular glue and had great results though, just make sure the glue is really dry before painting over everything, the finish will be a bit more “matte” in appearance but equally as lovely!
Love your work! So many things I’d love to try!
I’m glad Leona, happy crafting!